Have a LAB Transformation of your own?

We would also love to feature YOUR transformations! Submit your own LAB Work story, comments, & photos to: HapaLab@Gmail.com

10.27.2010

1. 2. 3. 4. 5.

Presentation:  Numbers & Counters


Beads.
I love beads.
Especially glass ones that shine so vibrantly.
They feel nice and cool between your fingers.
Weighted, smooth, flat on one side, domed on the other.

Last week, blue beads.
This week, red beads...plus some numbers.
This is a home-made "knock-off" of a classic Montessori counting tool:  Numbers & Counters

Wow.  Our 1st official HapaLab "Math" Tool!

The Goal:
Sight recognition of numbers, reinforce the sequence of 1 - 10.
Give a perceptual experience of quantity as a collection of separate objects.
Introduce the concept of Odd & Even.
More pincher skill maturation in arranging glass beads.

The Set Up:
1)  A container for the numbers (We used a glass bowl)
2)  A container for the count markers (We used a wooden box at first, then switched to a basket)
3)  Numbers 1-10 Characters (Can be wood or paper cut outs)
4)  Counting Markers: 55 (We used red glass beads, can be wood or paper cut outs)
The traditional tool uses wood numbers & wood counters painted red.

The Presentation:
1)  Roll out a floor work mat
2)  Bring the tray with all items assembled
3)  Start laying out the numbers at random on mat.
4)  Counting aloud "One, Two..." and start picking up the matching number and placing them in a row from left to right.
5)  Take out one bead, say "1", place the bead under the character.
6)  Continue to two, and start to form 2 columns (pairs) under the character while counting aloud.
7)  Keep going until all numbers are done, placing one bead at a time.
8)  Note that the Odd numbers have a bead placed between the last 2 beads side by side.  This is to teach the recognition of Odd numbers by looking down the line of numbers and distinguishing ones that have a single bead at the end of the chain.  The ones that don't have this single bead is Even.
9)  Once complete, replace all materials into the bowls or containers.
10)  Invite the child to try.


We decided to just start with numbers 1 - 5.  
Once we've got that down, we'll extend the exercise to 10.


This is still abit trying for Zo right now.  
He'll get it on good days as shown, and will appear to have gotten the idea of imitating the placement of the beads in the way I've demonstrated.  
However, it does not seem that he has yet connected the characters as the actual representation of what he has counted out in beads, at lease not all five yet.

So we'll be looking to grow with this one!

10.22.2010

Crime Scene

We all know this...
It's never good when it's "TOO QUIET" in the other room.

I turn the corner looking for him and find THIS.....

*GASP!!!*
Looking closer at the scene of the crime, I note the following clues to piece together this classic mystery puzzle.

Here are the tip-offs:
1)  A small glass of Kefir poured, bottle cap back on.
2)  Small bowl of nuts dispensed in someone's usual snack bowl.
3)  New Chinese kids book pulled out.
4)  Bag of M&M's with several cut marks around the edges.
(This bag was purchased as a new "reward" for night potty training.  One M&M for One dry diaper in the morning.)
5)  Orange scissors (main weapon) used by the perpetrator.
6) A stuffed panda bear named "Pandi" left at the scene.


As we have NOT done many scissor cutting work, 
the chocolates stayed intact, although suffering a number of snips at the perimeter.

The Keifer and nuts...well, that's another story.

After looking high and low, we found him...
It was none other than "Z".
The Dancing Snack Bandit!!!


Dah, Dah, DAHHHHHHHHHH!!!!


10.18.2010

Blue Fish

Presentation:  Tongs & Marbles


A mommy friend passed on this idea via another inspiring blog:   My Montessori Journey...  Rock on, my Montessori mommies!
This has been worked on DAILY of  Zozie's own choosing since the introduction a few weeks ago, thanks N!

The Goal:
Strengthen pincher & grip skills using tongs to grab a slippery marble.
Build hand-eye coordination in placing each marble onto the backside of a suction cup toy.

The Set Up:
1)  Tongs
2)  Small bowl
3)  Marbles
4)  Bath toy with suction cup as backing
(we got a Blue Fish)


The Presentation:
1)  Hold & pinch the tongs together several times in the air.
2)  Approach the bowl, grab a single marble
3)  Hoover over the bath toy, hone in on a suction cup, then drop the marble into it.
4)  Repeat until all marbles are placed.
5)  Reverse everything and place all marbles back into the bowl.


We started with a taller ceramic bowl as seen in the above photos...
but that was alittle too tall for Zo to work with.  
Let's say the frustration levels went up when he couldn't really see.  

So, we switch to the clear glass bowl with shorter edges, below.


See Zozie fishing around for his marbles below...
Definitely worth trying this one!


10.14.2010

Clean UP.

Such a sweet voice.
The lyrics to the song is, literally, music to my ears.


All the pieces where back in the box and the box back on the shelf.
But the memory space ran out on the camera to record.
Dang it.

Wish I could pretend the memory space ran out to record that I finished my laundry today.

10.11.2010

1816.15


It's been a while...class of 93' style.
Last post 10.01.10.

That's Tina, me, and Bek.
Looking very "high school" together.
Eating homemade flan and wearing a sage-colored apron... for the heck of it.

So what happened on 10.02.10?

Well, the "heck" happened to be a HUGE Yard Sale...
The Annual East Bay Mandarin Playgroup 8+ Multifamily Yard Sale.
To be exact.

And being the one who always over-commits with the delusion of having superhero resistance to fatigue (sigh), I volunteered to organize this whole thing.  From taking drop-offs, pricing all items, making signage, and displaying, this was going to be DA KILLA yard sale that I always dreamed of shopping at.

1 week of sorting and tagging, 2 extremely dark eye circles, 3 sleep deprived nights, 4 aching limbs, and 5 fabulous girlfriends taking "HELP Shifts" later...we are officially, and happily, DONE!

Do I regret it?
Not for a second.

The idea started when I began to clear out Zozie's room for HapaLab.  The cleaning oozed into my room, then out to the common areas.  Soon, I was scheming with a few mommy pals of doing a sale together...then it ultimately became, the BEAST.


99 cents?  R U out of your mind?!?
YES.  We were.
Take a look at the mayhem below.

Mouth of the Beast.

the morning RUSH @ check out.

the LONG driveway...


You're probably thinkin'...Geeshhhh, that's alot of C*@P!
That's what we thought too.

So nice to shed a few pounds in your life, eh?
And so nice to get some cold hard cash for those extra pounds.


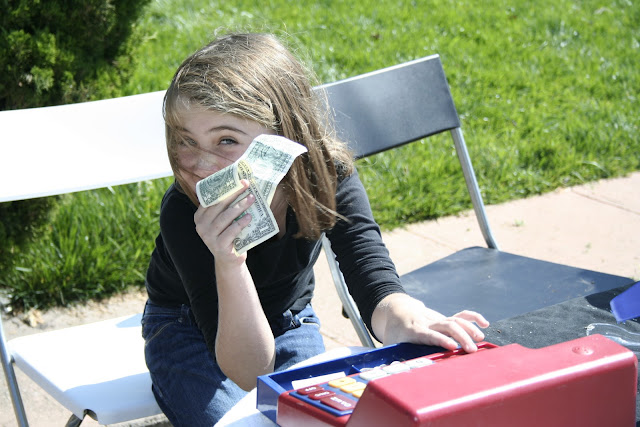
The Cousins had a Lemonade Snack Shop to greet our hungry shoppers...
When possible, always set up cute kids with food to sell.
Works every time.

yummmm...

It was SHOCKING...
to see how much extra junk we carried around in our houses and lives.  
A great time for Reflection. 

Thousands of things, literally, that weigh us down.  
Things we didn't need.
Things we thought we COULD NOT live without.

Really?
Really??
REALLY???
So here we are...
Ten days later.
10.11.10.
A fresh start, a clean slate, a blank canvas.
We're "Up in the Air" with an empty backpack...

The first thing back in?

1816.15

Our final sales total.
Really?
Really.


10.01.2010

LAB Work: Ben

Work Budget:  $104
Total Time:  1 hour + a trip to Ikea
Location:  El Cerrito, CA  

Meet our 2.5 year old pal Ben.
Zozie & Ben met when they were itee-bitee ones at Gymboree.


His parents?  An ER nurse & a printer..the fancy stationary old-school type.
They are one of the sweetest couples you'll ever meet.
They are also one of HapaLab's first followers!  Actually, THE first.
Thanks guys...

" I love your idea for your home school and blog - your design background really shows, as you've set up such a lovely space for Zo and the design of your website is so simple and clean - love it!  you've inspired R and I to carve out a little "office" for Ben in our seldom used dining room.  Though Ben has his train table & toys in his bedroom, his new little table is going to serve as his work and creative space where he can have all access to his art and learning supplies.  Still looking for a softer carpet to replace the rough woven one we had there and possibly going to add a bookshelf.  We're having so much fun with this!  Will keep you posted ~ Lily"


We showed up for a playdate and could not be happier... to see all THIS.
C'mon..let's take a peek at what L & R have done for Ben.
We'll start in the Dining Room, the "seldom used" one.


Ben's Office:
Since they eat in the kitchen, they saw great potential in their formal dining room for "Ben's office."
Like the parents, every kid needs a place to work too right?
Shifting their dining set down, they opened up a corner for a new work table, a pair of chairs, and an adult "helper stool".  They also added some floating shelves (spice racks)  for storage and display.  Ben's own artwork now dress the walls.  Nice work Ben!
Spent:  $50 Table, $20 Chairs, $30 Stools, $4 Spice Racks


Secret Storage:
Furniture that have hidden storage compartments are AWESOME!
The helper stool doubles as extra office storage as the red top comes off.
Extra crafts, games, puzzles...you can never have too much storage eh?


Open Art:
They left out markers, crayons, and other supplies in fun tin cups on Ben's work bench.  Having open access to his art supplies allows Ben to draw whenever he feels the creative bug, without mommy or daddy's help...


Book Bucket:  Our every popular Front Facing Book Display is here!  L used a cute canvas basket to display his favorite reading materials.  Placing books in size order is EXTREMELY helpful in having the child put the books back on their own.  Where does this book go?  The size of the book is their hint.

Book Nook:   L managed to reuse an existing comfy chair for Ben's little Book Nook.  The OX Ugly Doll is kicking back and waiting for Ben to come read him a book.  Beautiful natural light flood the nook through the dining room window.


After reviewing HapaLAB's post on Le Grand Foyer...L decided to add a few hooks to Ben's room for his backpack & jacket.  A smart stepping stool let's Ben turn the lights on by himself...instead of grabbing a book and pushing the switch up with the corner!  Daddy showed him that trick.  Nice, dad.
For the heck of it, here's a view into Ben's sweet bedroom.
It's geared up with a great TRAIN TABLE in the center!  
The extra storage buckets below are a space & mess saver, and the neat rug really grounds the space and adds a fun pattern that reminds us of railroad tracks...Choo Choo!
Again, love extra storage.  Love trains.


So there you have it.
WELL DONE L & R!

Just a reminder...
This is a SELF Transformation, NOT a HapaLAB Transformation!!

They read the blog...
They went and did it.
Yup. On their own.

No holding back now...go do YOUR own!
Please.  Be a copy cat.